
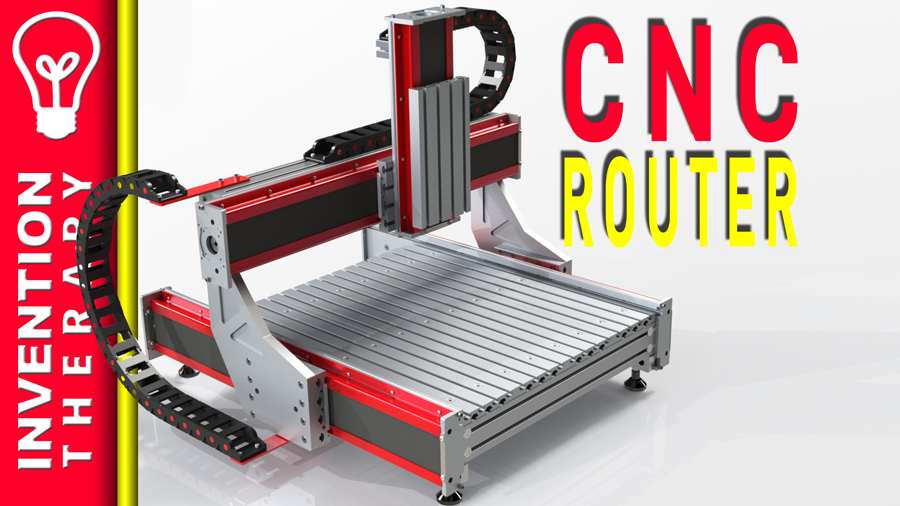
In my shop, there are laser cutters, 3D printers, table saws, and just about every other tool you can imagine. Of all the equipment in our prototyping and manufacturing facility, none has been more useful than our CNC router. When it comes to cutting sheets of plastic or metal, the CNC router does a great job without the need for a large and expensive CNC milling machine. While plastic and wood often cut like butter, metal sheets can be a challenge. Here is the best way to cut aluminum on a CNC router.
- Secure the material
- Keep tools cool and lubricated
- Use smaller endmills and cutters
- Obsessively clear the chips
- Use the correct spindle speed and feed rates
- Plan and optimize your cuts
- Be very patient
Secure the material
Even though you will be taking very light cuts with a small CNC router, you will still be creating a tremendous amount of friction and stress on the cutting spindle and the gantry that holds the router. Every section of your machine will be under enormous strain. You must mount your material, router, and cutting tools in the most rigid way possible.
The less that the machine moves relative to the cutting path, the better the quality of the parts will turn out. The way you secure the material is essential for any type of CNC machine but even more critical when using a CNC router to cut aluminum. You want to avoid as much movement between the cutting tools and material as you can.
If you have experience cutting wood or plastic, you will soon discover that aluminum is very different. The hardness of this material causes the parts, tools, and machines to rattle and move under enormous stress. If you are not careful, you can easily damage your CNC router.
The best ways to prepare your machine for cutting aluminum
- Use as short of tools as possible – The cutting surface of the tool only needs to be a little longer than the length of your deepest cut. Avoid using long tools as they will flex more than shorter ones.
- Take tiny cuts – Because your CNC router isn’t designed for cutting metal, it is best to limit the depth of your cuts to between 0.005″ to 0.010″ (.125mm to .250mm). You can choose a higher feed rate at these small cuts if your machine is built strong enough.
- Increase the strength of your CNC router. You may be able to use a larger router, increase the size of bearings, add some braces, and do other things. You want to make improvements that help reduce the amount of flexing with your machine.
The more time you spend making sure your parts are mounted correctly and that you are using the correct cutting methods, the better your parts will turn out. You don’t want to spend hours watching the machine run only to have the cutter break or part fly away towards the end. A little patience upfront can save you from disaster.
Keep tools cool and lubricated
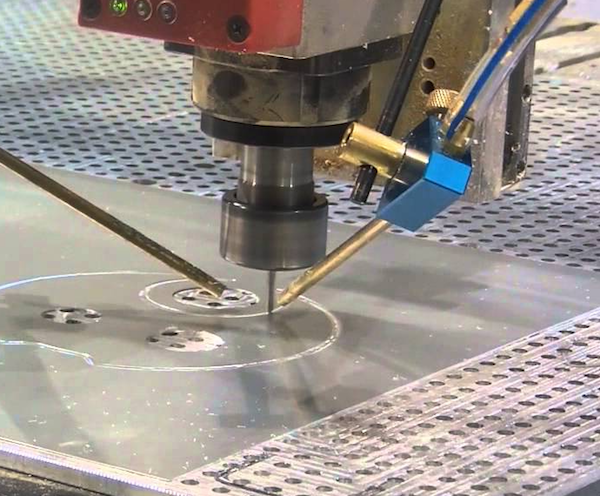
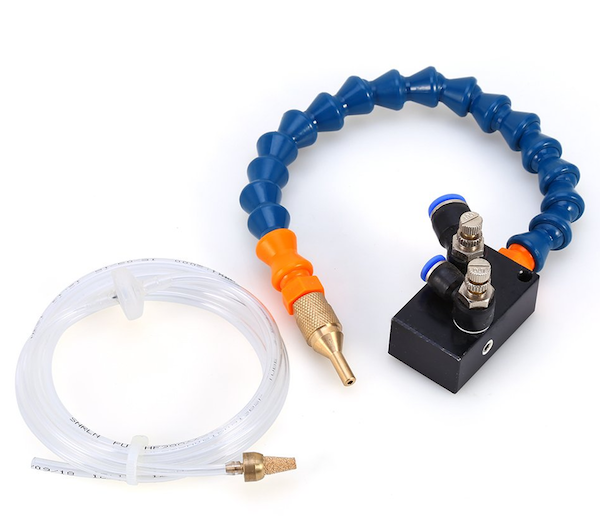
The most important thing to remember about cutting metal is that the tools need lubrication. There is a great deal of stress and heat that builds up as the cutting blades cut into the materials. Some websites will say you can just use air, but in most cases, when using a CNC router, you are going to need some cutting oil. The longer you run your router without oil, the more likely it is that the tool will break.
Installing an oil mister is one of the easiest ways to keep your material and tools cool while cutting. Oil misters are great for cutting both aluminum and plastics. Believe it or not, many plastics can be just as rough on the tools as when cutting metals.
If you are just planning to cut plastics on your CNC machine, compressed air or a vacuum will usually be enough. Keep in mind that the spinning cutter coming into contact with plastic can build up static electricity, so remember to provide a good ground path to discharge any electricity. Many of the products I have invented were prototypes cut out of plastic on a CNC router. I find that the solid material sometimes offers stronger, more finished looking components than what you can achieve on a 3D printer. It just depends on what you are building and the types of parts you prefer. In most cases, it doesn’t matter what you use to prototype as long as you can test the finished product before manufacturing your first run of parts.
If you don’t want to invest in an oil misting system, you can always just spray some WD-40 periodically onto the cutter. Many industrial cutting fluids are environmentally friendly and designed specifically for CNC machining. In the end, if you have a bunch of cans of WD-40 or any other thin oil lying around, it should work fine. You can even use a brush to lubricate the tool path from time to time. Just make sure you don’t get the bristles wrapped up in the spinning tool.
If you decide to use an oil mister, make sure your router doesn’t have a downward exhaust. These types of airflow systems cool the motor windings on those big Porta Cable or DeWalt routers. The fan blades in these routers will blow your oil everywhere but on the cutting tool. It will take some ingenuity to position your sprayer so that oil reaches the cutting path. You could use one of those small red tubes that come with the WD-40 cans to aim the oil mist directly at the tool. There are also many kits available online to help you control the air and oil spray.
While cutting wax is another excellent option, it works better in some instances than others. The advantage is that you can rub it onto the surface of the material to cut, and it won’t get blown away. You will, however, have to apply more wax with each new depth of the tool pass.
Cutting wax is great for use when cutting thin sheets of metal or during high-speed engraving. If you are cutting deep into material, cutting oil will still be the better choice.
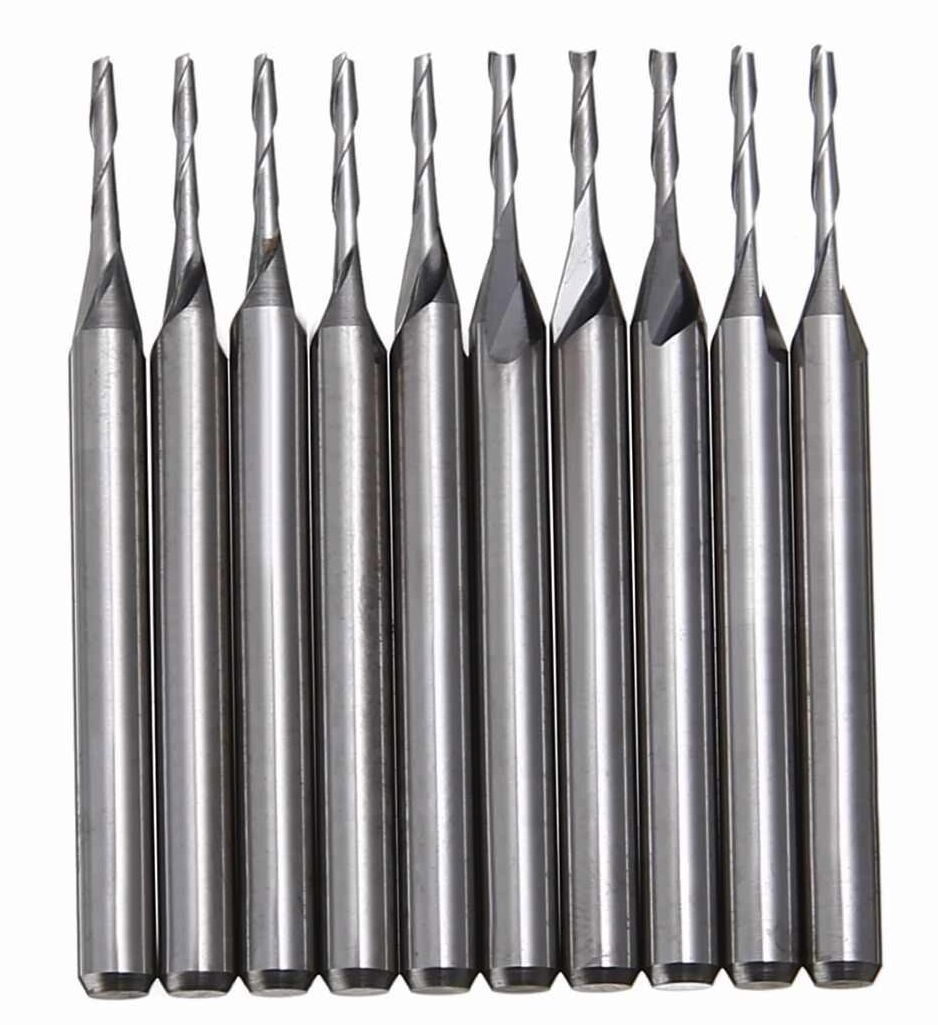
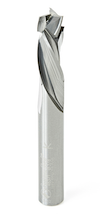
Use smaller endmills and cutters
Large industrial CNC machines can plunge deep into hard metals and rough cut large areas to quickly remove vast amounts of material. This ability to cut metals swiftly is essential when mass-producing parts to keep down the costs. After all, time is money when it comes to machining products.
Unlike industrial machines, a CNC router does not have a rigid or large enough frame to use larger cutting tools. You will be limited to small endmills and cutters. You will also have to take tiny cuts over a large number of passes.
How to choose the right cutting tool for aluminum:
- Allow ample room for the metal chips to clear – aluminum is soft, so it tends to stick to the cutting tools. Make sure there is plenty of room between the cutting flutes to allow for the metal to be lifted away from the part and the cutting blades.
- Use hardened and coated cutting tools – aluminum isn’t a hard metal, but it will still easily break off a small cutting tool. You should choose an end mill with a minimum of two flutes.
- Choose smooth and sharp cutters – As we mentioned before, aluminum likes to stick to the surface of the cutting tools. Always use a new cutter or end mill when using a CNC router to cut aluminum.
- Never use plastic cutting tools with aluminum – Plastic cutters either move the chips sideways or push them down towards the material. Always use end mills with flutes that lift the chips up and out of the cutting path when cutting aluminum.
If you’re looking for the short answer to which tool to pick when cutting aluminum, the best choice for me is a two or three flute carbide endmill. These endmills have ample chip clearance while the coating helps reduce the chance of aluminum sticking to the cutting teeth. You will get beautiful cuts, and the tools will last a long time when used correctly.
In most cases, when cutting aluminum with a CNC router, you will be limited to 1/8″ – 1/4″ endmills. Most CNC routing machines have small tool spindles with light-duty bearings and gantries. You will have to make multiple light cuts to reduce friction and wear, but your small CNC machine will thank you for it.
If your CNC router is a larger unit, a 1/4″ endmill should work fine. For smaller machines, 3/16″ or 1/8″ tools are best. Remember that larger cutting tools need slower RPMs.
Obsessively clear the chips
This simple tip will save you lots of headaches when trying to cut machine aluminum no matter what type of CNC you use. Like we have mentioned here a few times, aluminum likes to stick to the cutters and the parts. The more you can keep the cutting surface clear of the cut chips, the smoother your machine will run. Use air or a vacuum and keep your eye on the part as much as possible.
Suggested feed rates for cutting aluminum with any CNC machine
| Material | AISI/SAE/ASTM Designation | HSS Feet/Minute | Carbide Feet/Minute |
| Wrought aluminum | 6061-T6, 5000, 6000, and 7000 series. | 500 – 600 | 2820 |
| Cast aluminum | Sand and permanent mold casting alloys | 600 – 750 | 2820 |
How to set spindle speeds and feed rates
I wish there were an easy answer here, but this part of the machining process is more of an art than anything else. It takes years of practice to learn how to correctly cut each material at their maximum speeds with the best possible results.
Every machine is different. It doesn’t matter if you are running a large industrial CNC machine or a tabletop router. Each machine will have settings for feed rates and spindle feeds that work best. Unfortunately, each material will also have a unique setup for each and every machine.
Not all routers are created equal. If you look at our router in the videos on this page, you will notice that it is a mid-sized machine. It is a very expensive CNC router and nothing like one of those small tabletop models. One of the benefits of a larger machine is that you can cut larger sheets of wood, plastic, or metal. You must remember that even with larger machines, the spindle may not make it to the edges, which means your part size will usually be smaller than the travel distance of the X and Y gantries. You also want to make sure you use short tools and also keep the material as close to the spindle motor as possible to reduce any deflection with the Z-axis.
There are some well-documented cutting speeds and feed rates that you will want to try in the beginning. There is no sense in re-inventing the wheel when many machinists have dealt with these issues already. Once you get more familiar with how each material responds, you can begin to try your own settings.
Speed and feed rates for cutting aluminum with a CNC router
| Carbide Endmill Diameter | # Flutes | RPM | IPM |
| 1/4″ | 2 | 18,000 | 32 |
| 3/16″ | 2 | 22,000 | 21 |
| 1/8″ | 2 | 30,000 | 18 |
| 1/16″ | 2 | 30,000 | 10 |
If your router is capable of spinning at above 25,000 RPM, you should avoid using 1/4″ endmills and go for smaller ones at higher speeds. Some machines have air-driven spindles with speeds approaching 100,000 RPM. While that top speed isn’t necessary, it can improve the finish when using small cutting tools. High-speed spindles also work great when engraving.
Ignore the minimum RPM recommendations.
There is a great deal of misunderstanding regarding the minimum recommended feed rates. This does not mean that the tool can’t run slower; it simply means that the tool is most effective at removing the most material above those speeds. If your machine has limited feed rates and spindle speeds, go with what works best, which in some cases could be the maximum speeds for your machine. Don’t forget to keep your eyes (and ears) open to make sure the machine itself isn’t under any stress or that there isn’t too much-chattering noise coming from the spinning tool. This noise occurs when the rigidity of the machine is in question, and the structure itself begins to vibrate. There will always be noise coming from the surface of the material being cut, so you will have to learn how to interpret best what you see and hear.
You can go with high-speed steel (HSS) endmills instead of carbide coated ones, but the higher cost of carbide is outweighed by the fact that they make cleaner cuts and last longer than HSS.
If you are worried about the expense of broken tools, in the beginning, it probably a good idea just to pick a handful of HSS endmills off of the internet. You can always buy some carbide coated cutters once you get more comfortable with CNC machining aluminum on your router.
No matter which cutting tools you choose, make sure you keep your cut chips as small as possible without moving too slow. You will need to adjust your spindle speed, feed rate, and cutting depth to maximize your results. If you have a well-built machine, feel free to push everything to their maximum recommended limits to see what happens. If you have one of those cheap desktop CNC routers, change your settings to the bare minimum and go from there. You simply are going to have to test every cut until you get a feel for your machine while cutting various materials.
If your router has a fixed spindle speed, then you will just learn to adjust the feed rate and depth of each cut. There is no one size fits all solution so you will just need to experiment as you go. Some materials like aluminum are less forgiving, but with enough practice, you will get the hang of it and begin to understand the limits of your CNC router.
Plan and optimize your cuts
By planning your tool paths, you can reduce the number of passes needed to cut your part. This optimization will cut down the wear on both the cutter and machine. This part of the process is one of the most important aspects of cutting aluminum with a CNC router.
When you start a cut in a new area of the material, it is best to ease the tool into the path. Most CAM programs will generate these types of paths automatically as long as you set this feature as a preference. If you plunge quickly into the metal, you will put a great deal of stress into the router’s bearings and the machine itself. It is best to start cutting slowly and work your way into the part.
If you are cutting thin sheet metal, there are additional challenges to consider. Thin metals do not have any support and will flex and bend as the cutter passes through the sheet. I usually design these types of parts so that screws and be used in various places to hold down the metal. I use a first pass of the CNC router to cut the mounting holes and then screw the sheet down to a wood sheet beneath. Other tricks include sandwiching the metal sheet between pieces of plywood or using clamps around the edges of the parts. It’s up to you to decide what works best, but you will learn as you go.
With thicker materials, it is best to start cutting from the sides when possible. If the sheet of material is large, and you need to start from the center, program the path as a spiral to slowly lower the cutting tool. For really thick metal, you can use a back and forth ramping motion to slowly cut away the metal and lower the tool into the cutting path.
There are two ways to ease into cutting at depth with thicker materials.
For soft materials like wood or plastic, a verticle plunge will work just fine when starting a deeper cut. Harder materials like metal will require a more complex motion to get the cutting tool started. The tool needs to be lowered into the material because most of the work occurs on the sides of a CNC endmill and not the bottom as most people think.
CNC router Compression Bits
Router bits usually use a combination of cutting techniques to clear away material. Compression bits, as an example, uses both up-cut and down-cut spirals. These types of bits are fine for soft materials like wood and MDF, but with metal, the debris has no way of getting out of the toolpath. Downcut spirals will push the aluminum into the part and clog up the cutting tool. This could result in the tool becoming dull or even breaking as a result of aluminum getting clogged on the cutting blades of the endmill. That’s not to say that you can’t have problems with softer materials, so just be sure to clear the chips away with air or a vacuum. If not, you could burn or melt the softer materials.
So rather than risk damage to your tools or parts, no matter which material you are working with, it is always better to start your tool path with a more complicated move than just lowering the cutter.
Ramp cuts
A ramp cut plunges the cutting tool into the material while cutting around the edges of the part. It slowly lowers the endmill by creating the tool path on an angle. Once it reaches the final depth, the tool path continues at the same level without any additional changes to the Z-axis.
Ramps use both the side and the bottom cutters on an endmill at the same time. The channel created by the ramp also helps retain lubricating oils and allows for the endmill to easily lift chips away from the part.
Ramp Definitions
- SMOOTH. The simplest type of ramp. The cutter moves at a definable pace in a single pass to the bottom of the material.
- ZIGZAG. As the name implies, this type of ramp moves the tool back and forth to the maximum depth of the cut.
- SPIRAL. One of the more elegant types of ramps that moves the tool in a circular motion to the cutting depth. Spirals are also a popular method for cutting holes into the material.
A common method used when starting a tool path. Lead-ins begin on the edges of the part and work their way toward the cutting path. You can also perform a lead-out when exiting the part. These methods help improve the finish on the edges of the region that are nearest the start and end of the machining process. They also minimize any marks or bad edges that can be caused by the endmill exiting the tool path.
Types of Leads (tool path starts and finishes)
- STRAIGHT LINE. The tool enters at a straight line with an angle before beginning to cut.
- CIRCULAR. It starts in a circular motion before making contact with the part.
Plunge cuts are much faster and always used when time is critical during the machining process. So if you do decide to perform a plunge cut, make sure you use a slow feed rate until you get the bottom of the tool path. Also, be careful where the tool exits from cutting the part because it can leave undesirable marks.
These marks are caused by the relief of pressure on the cutting tool as it leaves the part. The sudden change in surface tension causes the endmill to flex and smash up against the material. This problem is easy to address and just requires a few extra steps to leave the part with a clean surface. You can end a small zig-zag or spiral movement to the tool as it exits the part for the best results.
Lead-ins and Lead-outs vastly improve the quality of the finished product and leave a much more beautiful finish. You usually only have to use these types of cuts during the final passes, where the tool path will remain visible once the part is complete.
Be very patient
The only way to learn CNC machining techniques is through trial and error. You won’t become a great machinist overnight, but with practice, you will be able to master the process. You can expect to break many tools and waste lots of time and material along the way. Just make sure you have some fun during the process.
A CNC router was never designed to cut metal, so you need to be very careful when cutting aluminum. If you have a little patience and prepare before starting the machine, everything should go smoothly. Be sure to plan on spending a long time in front of your CNC router, so have patience and cut as slowly and carefully as possible.

Are you ready to become an inventor?
Getting your idea out of your head and into your hands is only the first in a long set of steps towards becoming a successful inventor.

First Steps To A Successful Invention
At Invention Therapy, we believe that the power of the internet makes it easier than you think to turn your invention idea into a reality. In most cases, you can build a prototype and start manufacturing a product on your own. Changing your way of thinking can be difficult. Being an inventor requires you to balance your passion with the reality of having to sell your products for a profit. After all, if we can't make a profit, we won't be able to keep the lights on and continue to invent more amazing things!

Please subscribe to our Youtube Channel!
